Friday, 21 February 2014

Odds and Ends


Odds and Ends - do the little things make a difference?

50 Posts and 10,200 visitors to a site that was as much a search to find information and pictures to help me make better Canadian H-46s is a much greater outcome than I envisioned or hoped for, so a big thank you to those who share the modeling bug and want or need this information. So much more information and pictures than the modest beginning to this endeavour suggested was possible, again thank you for your support.

Don't let the warm fuzzy talk fool you though... this is not the end of the blog, far from it. As the opening phase comes to a close, you can look forward to more, however the approach will change from a discussion that essentially was about the 113 and 113A fleet from purchase to retirement, the new direction will focus on individual airframes.  The new direction will, as best as I can take the reader through a pictorial chronology of each aircraft from purchase and evolution through the major modifications we have discussed previously and finish with each airframe as it existed at retirement. The next phase will include in depth analysis as many known pictures as I can access.

While I want to know as much about a helicopter family in Canadian military livery I have a personal connection to, it is not the way I model. There are however the purist and the accuracy geek who want to be as accurate as is humanly possible to achieve in their chosen scale. This post will push the purist and accuracy nut as far as I think possible in available scales.

Doors - Emergency access handles


As an aviation enthusiast, I have become used to seeing emergency door handles painted with yellow and black stripes, so it came as a surprise to me to find, while pouring over pictures, that red white and blue Labradors had red door handles for quite a time.  The Labs while in the tri-colour livery were displaying the Canadian flag before door handles were painted with black and yellow stripes. Some pictures that I hope show this small and ultra subtle point. Voyageurs on the other hand have always had black and yellow striped emergency access handles.

Photo - DND

The best picture I have seen showing the red emergency access handle on the copilot's emergency escape door. It is difficult to see in this post, but this photo is on the Internet and should be easy to find in a size that clearly shows the red handle. DND photo.

In the original picture 401 has the red emergency access handles on the copilot doors by it does not appear that the left side emergency hatch as red handles.

Pat Martin photo - It appears the handles on the pilot emergency access and the dutch doors are all red. Note that the numbers of 404 are black.

While it is difficult to make out the emergency access handle almost directly above Derek Heye's head, it is clear that the handle is not read as is found on earlier Labradors. The sharp eyed reader may not be able to make out the black and yellow stripes of the emergency handle on the pilots emergency access, but the silver of the lock can be seen.


301 In the picture above taken by Jeff Wilson gives the reader a good look at the black and yellow striped pilot's emergency access handle. Note that the entire handle is painted including the lock in the middle of the handle. 301 Has been consigned to museum duty after retirement.

Picture by Scott Hemsley

The right front dutch doors with yellow and black striped emergency access handles. As a point of note, the tiny crash axe on the front upper portion of the lower dutch door is something I had not noticed before and to the best of my knowledge not common. For those that have not already figured it out, this is a 113A Voyageur airframe...the give away is the small access panel in front of the lower dutch door. Photo is by Scott Hemsley.


Left side view of the black and yellow striped emergency access handle of 301. Even if we did not know this was 301, we would recognize that the airframe is a Labrador by the fact the emergency access is rectangular and the handle versus the door seal strip of the Voaygeur.

An obscure detail, but interesting in that it demonstrates the variability of livery detail if nothing else.


Thursday, 6 February 2014

Crash Position Indicator (CPI)

Crash position indicators (CPI)
For modelers looking to add a crash position indicator to their CH-113 Labrador or CH-113A Voyageur the rules are fairly straight forward, the helicopter, regardless of variant must be yellow...that is of course with two exceptions that will be obvious later in this post.

A close up look of the CPI - Photo Scott Hemsley

The first exception is an unpainted Labrador 303(below) being overhauled by Boeing at their Arnprior facility. While the lack of paint is interesting, the location of the CPI is of even greater interest.


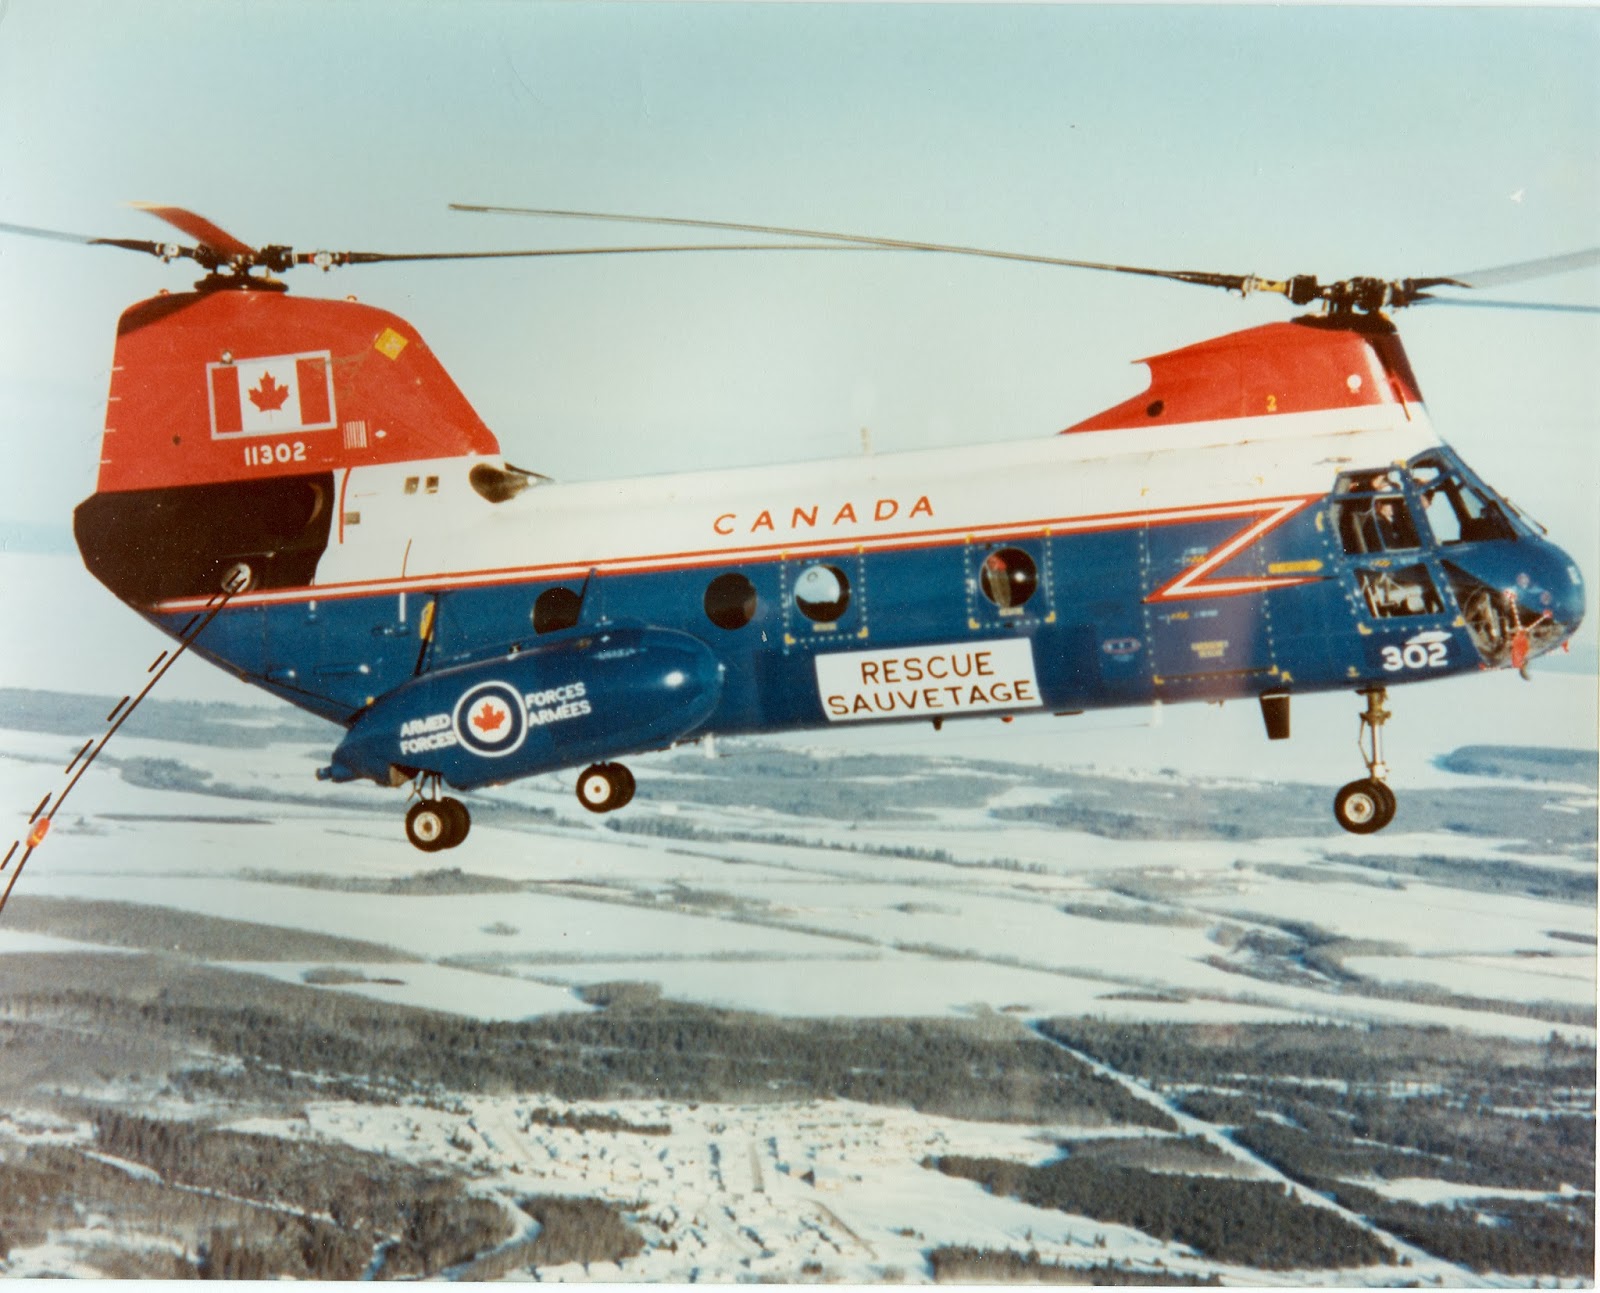
The second exception is Labrador 302 in red, white and blue livery during CPI trials. The DND photo below was sent to me by Mike Belcher. Note the position of the CPI is aft of the exhaust.


304 in front of 407 Squadron hangar in Comox, 1984. Note that CPI is below and aft of the exhaust. The helicopter is SARCUP modified and has the cone shaped engine inlet screens.

304 Again, however the engine inlet screens are the top hat style, but most interesting is the fact that the CPI is now located directly below the exhaust, so for some unexplained reason the CPI has been relocated.


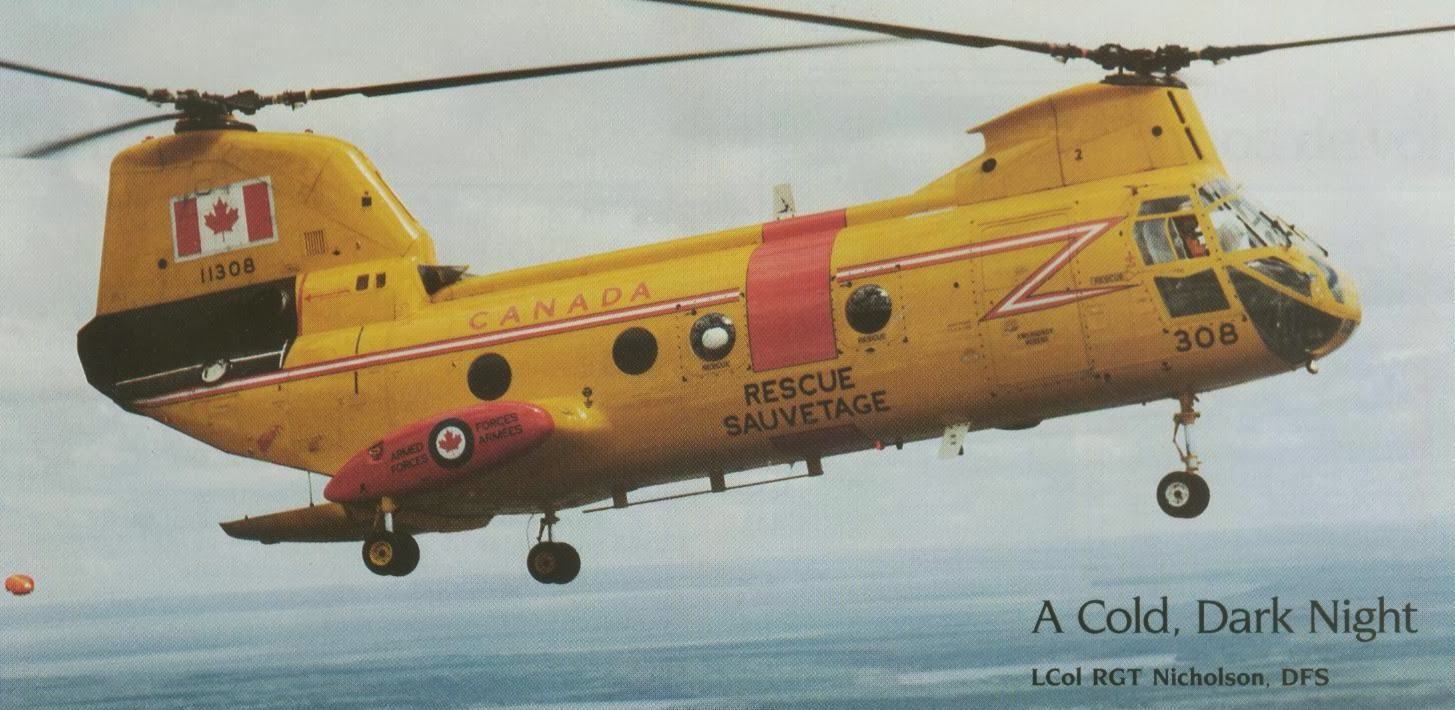
The picture above is a hint that 11308 in yellow pre-SARCUP livery may well have been involved in CPI trials in Cold Lake. Position of the CPI is aft of the exhaust. Meanwhile aircraft 310 is pictured below with the larger tanks, but no radar or CPI.  Still other photos show 311 with both the larger tanks and radar, but still no CPI? For the modeler, this means there are a whole host of options for 113 variants where the CPI is concerned, but all, with the aforementioned exceptions, are in yellow livery. The photo above is a DND photo scanned from the CF flight safety magazine "Flight Comment". The photo below was taken by me (Randy Brown) while stationed in Gander, Newfoundland (103 RU).


A Pre-SARCUP 308, possible during CPI trials?

308 Again without a CPI, this time however the CPI was lost in flight. After landing at CFB Comox following the CPI loss, I took this picture, which was scanned from a 35mm slide.

Voyageur CPI clearly located below the exhaust.

318 With conical engine inlet covers and a CPI located below the exhaust.

A SARCUP 113A in the water during SAR Mewasige - 30 Sep 86 off Missassagi Island . The location of the CPI is aft of the exhaust. The extra nose glass and is good evidence that this helicopter is a Voyageur variant. The engine inlet screens are conical. At some point the CPI would have been relocated and the screens changed to the top hat style. Photo - Ted Brown

In the next blog I will get closer to the end of this phase of the original blog intent and start setting up the blog to address individual aircraft in their various stages of evolution. The intent is to look at each air frame chronologically starting from purchase to retirement as was done in the first phase.

Saturday, 1 February 2014

Cockpit Details


This will be a very short blog for a few reasons. 1) I worked in the back end and while I spent enough time in the green house to know my way around the cockpit, particularly since it was necessary for putting the helicopter to bed on flights that terminated away from base and getting ready for the next day's trip away from base, the cockpit was someone else's office. 2) I do not have very many pictures of Labradors or Voyageurs that would illustrate the subtle differences between the two cockpits. 3) As a modeler of primarily 1/72 scale models and only modestly detailed models, cockpit detail is not a priority for me. For me cockpit differences of the 113 or the 113A are unimportant.  Pictures will give the modeler some indication of how the “pilot’s office” or inside the “greenhouse” generally looked. As one might expect the look of the instrument panels changed over the years while the aircraft was in service, but from my perspective only the modeler obsessed with detail and accuracy would care and from a modeling viewpoint that level of interest is too obscure to spend a great amount of effort or time on, my apologies for my lack of interest in this area. !

The above Carole Egan/Mo Smith photo shows late model 113/113A cockpit. The evidence is the glass instrumentation not found on the earlier aircraft.

Another shot of a later day cockpit. I know this because Capt. Mark Levesque is with 442 Squadron, CFB Comox. Mark and I flew together very briefly in 103 RU, Gander, Newfoundland. I arrived in the summer of 1980. He does not appear in my logbook at all so either was not an AC when he left 103 or left 103 the summer of 1980? If detail is your thing, not the ashtray attached to the back of the right hand pilot seat, the white cockpit light  Mark's head, the green tipped handheld light above the SPH-5 helmet worn by Mark. Another era marker is that fact that both pilots are wearing blue flying suits and flying jackets, not the gray of the early RCAF, tan or green common in the early 80's.  Note the outside air temp gauge at the top of the middle glass panel.


I am guessing this picture was taken in an earlier time based on the unidentified pilot's green flight suit and jacket, early style flying helmet although the instrumentation is not wildly different. At the base of the centre glass panel is the standby compass, often referred to as "Mickey Mouse". There was a handheld light on both sides of the cockpit...in this picture it appears in front of the pilot's helmet.

An unabstructed view of the cockpit from the FE's seat. This is again a later version of the cockpit as the glass instrumentation and orange seat (vs red) nylon seat covers would indicate. If my memory is any good, I believe the standby compass was a piece of the cockpit instrumentation that hardly if ever changed?

A look at the circuit breaker panel with other assorted switches including the main power switch.


The above technical drawing illustrates the pilot/copilot seat of a CH-113 Labrador.

The above illustration is of a CH-113A Voyageur. I find it somewhat bewildering that although there were some operational differences such as the floors and winches/hoists, that made some sense, I find the differences in cockpit seats odd and maybe even petty? This a difference that to a 1/72 modeler might ignore, the 1/48 modeler with an attraction to detail would pay attention to?

A representative drawing that I am unable to date, but include as a general reference.

In my next post, I will pass on some information and pictures regarding the crash position indicator (CPI).


Saturday, 25 January 2014

Survival Equipment (not to be confused with rescue gear)

In the previous post discussion and pictures focused on rescue equipment used almost wholly and exclusively by search and rescue personnel. This post will look at the equipment intended to be used in a survival situation, whether training or actual, by the crew. As a side note, tents and land survival equipment rarely reached the light of day for any purpose other than routine inspections or the occasional training exercise whereas life rafts and life jackets may not have actually been removed from their storage containers between inspections they were quite frequently readied for use in preparation for an expected and real life ditching...that almost never occurred...307 ditching in the Georgia Strait being the one actual ditching that comes to mind as I write this post.

Placement and storage of the survival equipment was mostly similar between units and from one era to the next so for the modeler there is quite a bit of latitude or choices for modelers. As I type away, I can only marvel at the results this scant information provided in this post will lead to by some of the many detail focused modelling masters an area I personally find most challenging.

This Derek Heyes picture sets the tone for the rest of this post. The green box on the left under the stretcher is one of the Flight Engineer's tool kits (it is on wheels). On the right side below the Stokes litter is the orange horse collar...this rescue tool did not actually have a particular location and even at any given unit could be found in a variety of locations.  Ahead of the stokes and hanging from the seat rail above the windows is the SAR Tech medical kit typical of the 70's and 80's.

In the photo above, Scott Hemsley has capture a wide range of equipment. To the right of the photo is the radio rack at the front left side of the cabin. The left side emergency exit has painted black and yellow placards and a yellow webbing strap to remove the door. The 10 man liferaft sits at the base of the emergency exit. Above the emergency exit is the seat rail used to secure troops seats to is a white fire extinguisher while the left side illustrates the yellow Vary (sp?) pistol housed at the front of left side radio rack common in the 80s and beyond.

In this above photo, Scott Hemsley has given us a look at the same left side emergency exit and placards, the front of the right side radio rack, the hot cups and the unmarked 10 man liferaft. Note the fire extinguisher is red and below the extinguisher is the electronic locator transmitter (ELT) and not to be omitted, the lower troop seat rail the ends to the right and below the emergency exit.

Once again Scott Hemsley offers up a good look at the radio rack in front of the left side spotter seat. Note that the green storage curtain (?) contains small and large size horse collars. The corner of the yellow 10 man lferaft is visible ahead of the radio rack. Of interest to me is the blue SAR Tech harness "monkey tail attached to the troop seat rail. This strap attached to the back of the blue SAR Tech harness. Earlier harnesses were green and had a similarly green coloured monkey tail.

Sticking with the them of variance, both small and large horse collar are pictured above, the green olive drab bag between the two was used to hold a garbage bag. An olive drab harness, at this stage of modifications, used by Flight Engineers, hanging on the Vary Pistol container. It was not the normal practice to hang the harness here except when use of the harness was impending.

Yet another look at the radio rack. The yellow and red items at the top of the radio rack are crepe paper wind drift indicator most commonly used to assess wind direction for parachuting, but occasionally used to assess wind for other procedures...which because of the effect of rotor wash not overly common much for any thing except parachute wind drift assessment.

Not really sure what is in the orange bag in this Derek Heyes photo, but note the orange equipment label on the front of the 10 man life raft and at the very front of the radio rack hangs a static discharge cable used to dissipate static electricity from the hoist cable and hook. Inside the radio rack is a crew helmet...likely a Flight Engineers as it is white. Pilots typically took and stored their helmet bags in the cockpit and SAR Techs typically work orange helmets before the use of the green helicopter (SPH-5 I believe) helmets.

The yellow script at the bottom of the picture says it all. Note that the raft is secured in position with a seat belt and that the troop seat rail is not in place at the bottom of the emergency exit.

The green first aid kit in this picture is positioned above the radio box located aft of the right spotter seat. Note the colour of the arm rest at the spotter position. Blue was pretty much atypical, however the closer the 113/113A got to retirement the more likely it would become to find this type of material variation.

Tents, snowshoes (standard CF issue), aircraft first aid kit and an unidentified orange bag beneath the left side front stretcher. Between the stretcher and tents are the tent poles in an orange bag.  Straps used to hold the tents in place were locally made so there was some variety in these.

I guess the things to note in the above picture are the green Flt Engineer tool kit on the red aluminum boxes that probably contained more FE supplies, the green helmet bag end of the stretcher. Before  the use of the green nylon American style helmet bag in the 1980s, CF helmet bags were blue cloth bags without pockets and zippers. The white bag on the aft upper stretcher is a 1970s style dive bag...suggesting the SAR Tech was older. Once upon a time dive equipment was spare and stored in locally manufactured bags or OD parachute bags. In the 1970s the white NAVY dive bag with flipper pockets were common until authority to purchase and use civilian dive accessories gained prominence on the front lines.

Mo Egan/Carole Smith took this picture during a Ottawa area CASARA training trip which would have meant the interior arrangement would be suitably rearranged to suit the trip. While the red troop seat was not common equipment, the red webbing backing for the troop seats were used when the SAR boxes were in place. The half hung status of the webbing back is pretty typical as everyone wanted a window and looking through the webbing was awkward to say the least. The read bag on the upper seat rail could be either spare headsets or more likely in this picture passenger life vests. The gray headset in use above is standard...crew headsets were usually green David Clarkes....when they were worn. Helmets were more often than not the standard headwear on CF SAR helicopters as they afforded the wearer better noise attenuation.

Brad Gough, then of 103 RU Gander is wearing the standard David Clarke headset during a SAREX search exercise. Note the orange SAR Tech first aid penetration kit at upper right side of the picture. To the left of the window is the brownish coloured heat vent that fed heat to the cabin and kept the search blisters defrosted.

In my next post, we will very briefly touch on 113 cockpits.

Saturday, 28 December 2013

Interior - SAR Equipment

Included in this post are several pictures showing the search and rescue equipment. Hopefully the pictures will give the reader some ideas as to how the equipment was stored and an idea as to what some of the equipment looked like. Unfortunately, as has been the case throughout this blog I frequently do not have the names of the photographers and thus hope I do not offend anyone by including the pictures in this post. My apologies to the photographers for not having the information for providing credit. Should I find the names of the photographers, credits will be applied or pictures removed as required when I update the document?

A quick note, the theme and intent of this blog is rapidly reaching the point originally conceived as the end, however as the posts were being entered, there are other ways that the blog can and will go that will benefit the modeler, so stay in touch.

Billy Pugh Rescue Net and Stokes Litter

In 1976 when I arrived at my first SAR squadron, we regularly practiced with the Billy Pugh and Stokes Litter. Over time the Billy Pugh, like the front door pickup fell out of favour and by the time the Labrador and Voyageur were retired, the procedures were only occasionally used. The Litter on the other hand was a mainstay in the equipment used in the full extreme of rescue scenarios. It is my intent to show some pictures that may become the inspiration for a 113/113A diorama.

413 Transport and Rescue Squadron, based in Summerside, Prince Edward Island practice recovery of personnel using the Billy Pugh rescue net. 301 Pictured above in Summerside harbour is pre-SARCUP and still equipped with the Swedish boom.

The Billy Pugh folded an stowed mid-cabin on the starboard side of the fuselage ceiling. Note the aluminum coloured Stokes Litter further aft in the cabin.

Note the location of the Stokes Litter ahead of the Billy Pugh. The stowage location of the litter and the rescue basket is unique to 424 Trenton aircraft. Note there is no cutaway knife at the end of the last equipment box on the right. Note as well the roller tracks without rollers and the hydraulic hand pump handle.

Another look at the Billy Pugh. The two orange bags are not unique to the aircraft at this unit, but are uni, the que in that they are both orange whereas they could also have been red or green. The bag on the right is inflatable vests (Mae Wests), the bag on the left is passenger used head sets.

While the use of the rescue net was primarily a marine procedure, it could and was used during land training or rescue. The picture above was taken during an international SAR exercise in Florida in the 1970s. While the black and white picture does not make it obvious, the foam bumpers on the top and middle of the net are yellow, whereas in later years the bumpers were orange.


SAREX 1976 at a USAF airbase in Florida. In the above scenario, the rescue team on the ground is having additional equipment lowered to them.

Here the rescue net (or if you like, basket) is being lowered to a rescuer in the water. The rescuer would have entered the water by doing a front door entry or the basket itself. The drogue used to stabilize the net once it was in the water, is trailed below the net and can be seen in the shortened version. The longer length (approximately doubled) would be used in rougher water conditions.

The basket on its way back to the helicopter with one person safely tucked inside. The net was capable of carrying two average sized adults.

Because the early CH-113A Voyageurs were not fitted with an external hoist, the Billy Pugh rescue net was not carried and therefore not used by green or early pre-SARCUP Voyageurs. The Stokes Litter on the other hand was carried by SAR 113s and 113As. To use the Stokes in training or operationally, the straps on the litter were relocated more towards the head of the litter so the net could be recovered into the aircraft making for a very precarious ride of patients. Unfortunately, I do not have pictures of this strap arrangement. Once external hoists were mounted to Voyageurs, the straps on all litters were identical.


Note the use of the orange "SAUVETAGE" on the right side of this Labrador. The picture is the only picture I have that shows the early style Stokes Litter. A couple of additional noteworthy points. The basket wire is very similar to "chicken wire". The broad red strips to the right of the picture on the right are floatation devices, thought to be necessary to keep the patients head up should the litter end up in the water. This innovation was eventually not deemed practical given the odds of such a circumstance happening. The practice did not survive beyond the late 1970s, although still very much under consideration in the early 1980s. The last thing to note is the guideline attached to the foot of the Stokes litter indicating the Para Rescueman is guiding the litter from a position towards the rear of the aircraft. Depending on the conditions, the rescuer on the ground guided the litter into the aircraft from the rear, the side or the front so any scenario for a diorama is possible.

The Stokes Litter, while stowed in the aircraft held other equipment. From the left is the guideline (A repurposed Sky Genie rope dyed blue to warn rescuers that the rope was no longer acceptable for deploying persons). The rope was white up until about 1978 or 1979. Wrapped in the orange patient covers on the outsides of the basket are wool blankets. Inside the blankets in the middle of the litter are long rigid splints (orange) and the Kendricks Extraction Device (green). At the foot of the litter is an electric blanket (28 volt) used for hypothermia patients. The straps were always dark khaki green. This litter is orange, whereas in my experience they were typically aluminum painted metal.


A typical SAR arrangement for 442, 413 and 103 aircraft. Note the location and colour of the Stokes Litter. Other interesting points, includes the method of stowing the passenger seat belts...the greem medical kit below the Billy Pugh and the red pouch below the stokes that holds aircraft emergency cards typical of commercial aircraft. At the end of the box seating is the aircraft survival equipment, stored in an unusual location possibly to accommodate other equipment in their normal location.

Clearly a CASARA training exercise, note the colour, style and storage location of the Stokes Litter in this 424 Trenton Voyageur.

Note the location and angle of the stokes...indicating the rescuer is standing to the front of the aircraft in what is likely a training exercise...the height suggests the exercise is for an airshow or other demonstration as we usually did not conduct this exercise with such a high hover.

A fairly typical training exercise, being conducted at Summerside. Most exercises of this nature would be practiced on land, from a ship, the side of a mountain or amongst trees day or night.

The rest of the SAR equipment...

Left side forward litters showing the top litter stowed, the lower litter in use. On the litter is a crewmember's green helmet bag. Underneath the litter is the orange oxygen kit and red AMBU kit.

The orange Flynn oxygen kit, military anti-shock trousers (yellow box), red AMBU kit and the AVIOX chemical oxygen kit (black) with a spare AVIOX bottle in the middle. All the equipment is stowed under the front left side litter.

The black and yellow lower dutch door extension and the centre hatch hoist are stowed aft of the oxygen equipment in the previous photo on the left side beneath the litter. The orange bag above contains the tent poles of the crew survival tent.

An early example of the explosives box behind the right side spotter seat of this Voyageur. Note the early green coloured crew harness. Later harnesses were blue. The explosives box typically held cold smokes (3 minute orange) and SDN marine smokes...the numbers of each for the modeler is irrelevant. Ammunition would have been stored in one of the seat boxes.

Later version of the explosives container in the same location as the previous photo.. Note the blue crew harness.

In the next post, we will discuss the aircraft survival equipment, the cockpit and where the future of this blog lies.